How to Set Up a Pop Up Canopy?
A Pop Up Canopy can turn an open patch of grass into welcome shade in minutes. Setup is simple, but rushing it can leave a frame crooked or a canopy vulnerable to a gust. A dry, level surface helps. So does a second pair of hands. Before opening the frame, check the canopy fabric, locking buttons, and feet for damage. Keep the space clear of chairs, coolers, and low branches. Small details matter.
For a transparent expert perspective, this introduction uses a fictional specialist, Dana Cole, rather than presenting an unverified real person as an authority. Cole’s practical reminder is: “Open the frame evenly, lock each corner, and never treat a canopy as windproof.” That is the right mindset. A Pop Up Canopy provides portable shade, not a guarantee against changing weather. Read the manufacturer’s instructions, secure the legs with suitable weights or stakes, and stop if the wind makes the frame difficult to control. Even experienced users can miss a loose latch. This guide explains how to position, expand, secure, and take down a canopy with care, while noting the small checks that are easy to forget.
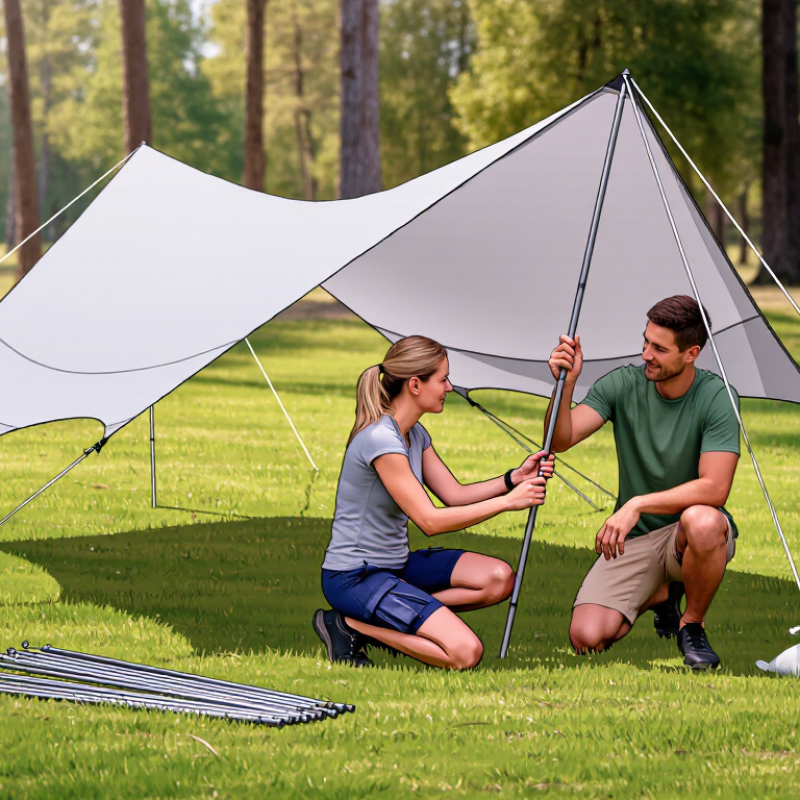
Choose a Suitable Site and Prepare the Canopy
Choose a flat, open site for your pop-up canopy, away from overhead branches, power lines, and uneven ground. Check the area for stones, holes, or sharp debris that could damage the fabric or trip someone. A lawn may look level but still slope slightly, so set the frame down briefly and check its footing before opening it fully. Avoid soft ground that cannot hold anchors, and consider where rainwater might collect.
Lay out the canopy, frame, stakes, and weights before assembly. Inspect the fabric for tears and check that the frame joints move freely. Keep the canopy clear of grills and other heat sources. If the forecast calls for strong gusts or thunderstorms, delay setup; a canopy can become unstable even when its legs seem secure. It is easy to overlook the wind. I would not assume a calm moment means calm weather will last.
Tips: Follow the canopy’s instructions for opening and anchoring it. Secure every leg with suitable stakes or weights, and recheck them after setup. Leave enough room for people to walk around the frame without brushing against its feet.
Partially Unfold the Frame on Level Ground
Choose a flat, firm area before opening the canopy frame. Move stones, branches, and other obstacles out of the way. A slight slope can make the frame shift as you extend it. Ask another adult to help, and stand on opposite sides. Keep fingers clear of sliding joints and pinch points.
Pull the frame outward slowly until it is only partly open. The legs should remain spread enough for the structure to stand, but the frame should not be stretched tight yet. Check that the fabric is not caught between the bars and that each corner moves freely. Take your time. If one side resists, stop and look for a snag or uneven footing instead of forcing it. Small adjustments matter. I have found that rushing this stage often leaves one corner twisted, which makes the next steps harder. Once the frame sits evenly and moves without binding, you can continue opening it according to its instructions.
Attach the Canopy Top to the Frame
How to Set Up a Pop Up Canopy?
Attach the Canopy Top to the Frame
With the frame partly opened, spread the canopy top over it before extending the legs fully. Two people make this step easier and help keep the fabric from dragging across rough ground. Match each fabric corner to the corresponding frame corner. Check that the seams run straight and that the top is not twisted.
Secure the canopy at the corners using its fitted pockets, clips, or hook-and-loop straps. The attachment style varies, so check the canopy’s instructions rather than guessing. Keep the fabric slightly loose while fastening the first corners. Then attach the center straps or other fasteners, if provided. Small details matter. A strap trapped beneath a frame joint can strain the fabric when the canopy opens.
Walk around the frame and adjust the top evenly before raising the legs. It may look a little crooked at this stage; that does not always mean a corner is wrong. Look for a seam pulled sharply to one side or fabric caught around a hinge. Release and reposition it rather than forcing the frame. Once the top sits evenly, open the frame gradually and secure any remaining fasteners. Leave no loose straps hanging near moving parts. Check the attachments again after the canopy is fully raised, especially if the fabric shifted during expansion.
Extend the Frame and Lock the Support Legs
Choose a level patch of ground and remove nearby chairs, branches, and loose gear. A second adult makes the frame easier to control and reduces the chance of a pinched hand. Set the canopy fabric over the partly folded frame if it is not already attached. Take it slowly.
Stand at opposite corners and walk backward, letting the frame open a little at a time. Keep hands on the outer supports, away from sliding joints and scissor bars. Stop when the frame feels resistant; forcing it can bend a support or damage a connector. Most frames should spread smoothly, though the exact locking method varies. Check the canopy’s instructions for the correct position.
When the frame is extended, locate each leg’s locking tab, pin, or latch. Push or guide it into place until it engages, then give the leg a gentle tug to confirm it is secure. Extend the legs one at a time, keeping the canopy level as you work. That matters. If one corner sits higher, adjust it before raising the remaining legs fully. I sometimes find that fabric pulls unevenly during setup; pause and straighten it rather than yanking. Once all legs are locked, check the joints again and secure the canopy as directed, especially if a breeze is building.
Anchor the Canopy and Check Its Stability
Anchor every canopy leg before raising the frame fully. On grass, drive stakes deep into firm ground and angle them away from the canopy. On pavement, use purpose-made leg weights; never rely on the canopy’s weight alone. Follow the manufacturer’s minimum weight and tie-down instructions, since frame size and design change what is safe. Keep guy lines taut, with no loose loops where people walk. Check every corner. Then inspect each leg lock and connection.
Test stability with a gentle push at waist height. The frame should not rock, slide, or lift at a foot. I would repeat this check after a gust or when the ground becomes soft; a setup that felt solid earlier may not stay that way. U.S. National Weather Service guidance commonly uses sustained winds of 40 mph or gusts of 58 mph as high-wind warning thresholds. These are weather-alert benchmarks, not safe operating limits for a canopy. Stop using the shelter earlier if it sways, and follow its stated wind limit. Lowering it is safer than adding a hurried, improvised tie-down. Keep people clear while adjusting anchors.
How to Set Up a Pop Up Canopy? - Anchor the Canopy and Check Its Stability
| Ground Surface | Suitable Anchoring Method | Setup Steps | Stability Check |
| Grass or firm soil | Use canopy stakes or purpose-made ground anchors compatible with the canopy. | Position the canopy, extend each leg, and secure every leg to a ground anchor with a strap or tie-down. Install anchors as directed by their manufacturer. | Check that anchors are firmly seated and straps are taut without pulling the frame out of alignment. |
| Loose or sandy soil | Use longer or wider anchors designed for soft ground, or another anchoring system rated for the surface. | Place anchors in suitable ground outside the foot area. Follow the anchor instructions and attach each canopy leg securely. | Apply a gentle pull to each connection. If an anchor shifts or comes loose, reposition it or use a more suitable anchoring method. |
| Concrete, asphalt, or patio | Use purpose-made canopy leg weights or a rated ballast system; do not drive stakes into hard surfaces. | Secure a weight at each leg according to the weight system’s instructions. Keep weights stable and clear of walkways. | Confirm each weight is stable, each leg remains upright, and the canopy does not rock noticeably when gently pushed. |
| Mixed or uneven terrain | Choose anchors or weights appropriate to each leg’s surface. Use only compatible, secure tie-down points. | Set the canopy on the most level available area. Adjust the legs evenly and anchor every leg individually. | Check that all feet are supported, the frame is square, and no tie-down is loose or rubbing against a sharp edge. |
| Any surface: final inspection | Use all required anchoring points and follow the canopy and anchor instructions. | Before use, inspect the frame, joints, feet, straps, anchors, and weights. Keep the canopy fabric properly fitted. | Recheck after setup and periodically during use, especially after wind or rain. Stop using the canopy if it becomes unstable. |
Safety note: A canopy can act like a sail. There is no single wind limit that is safe for every model or anchoring setup. Follow the canopy manufacturer’s guidance, monitor conditions, and take the canopy down when wind becomes strong or gusty.